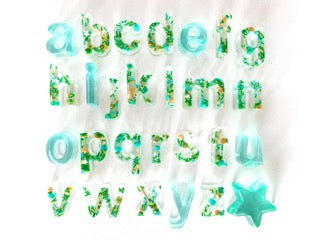
DIY Resin Alphabet Letters
busybebesatx
The cutest sprinkle letters made with the cutest little princess helper! Read on for all the details you need to make your own!

Materials:
- Art Resin (16 oz makes about 1 set of letters) or Bulk Art Resin
- 3 Silicone Beakers + Stir Sticks OR Plastic Measuring Cups with Sticks
- Disposable Gloves
- Bowl of Sprinkles
- Toothpicks
- Silicone Molds of Letters, Numbers, Shapes, Etc.
- Large Cardboard Box / Old Sheet Pan / Disposable Table Cloth / Large Stack of Newspaper / Silicone Art Mat
- Fine/Extra Fine Nail File
- Nail Polish Remover
- Optional: Resin Coloring
- Optional (For Removing Bubbles): Heat Source such as matches, food torch, lighter straw
- Optional (If You Pre-Heat Resin + Hardener): Plastic Cups/Thermos + Sharpie
Directions
1. Prep your materials and work area (preferably a well ventilated space).
- Put on your gloves!!! So important. Do not attempt this without gloves or you will be scrubbing your hands raw for days to get them clean. If you do get some on your skin, wipe it off immediately with a paper towel, and use nail polish remover to get the rest. Wash thoroughly with soap and water.
- Lay a broken-down cardboard box, thick layers of newspaper, a disposable tablecloth, or silicone art mat flat on your work surface.
- Place silicone alphabet mold on an old sheet pan (for extra protection) or directly on prepped work surface.
OPTIONAL: If you want to warm your resin and hardener, prep your warming cups. Some people believe this helps to minimize bubbles. I've personally found no difference.
- Label one plastic cup "H" and the other "R".
- Fill each cup 1/3 to 1/2 full with very warm water.
- Pour hardener and resin separately into silicone beakers. Carefully place each beaker in a cup of water (as labeled) - you don't want water to spill into your beakers! If you bought the 16 oz size, you could place each 8 oz. bottle directly into a thermos of warm water.
2. Add sprinkles to silicone molds. **This is when your little can help!**

3. If you warmed your resin and hardener, use your third beaker to very carefully measure 100 ml of resin and 100 ml of hardener into the beaker. If you skipped warming, you can pour directly from the bottle into a beaker.
OPTIONAL: Add in resin color of choice now.
4. Use your stir stick to slowly stir for 3 minutes. Stirring quickly creates more bubbles. DON'T SKIP THIS STEP!
5. Carefully pour resin into molds as thick as you'd like your letters to be. A word of caution if you don't fill them all the way: it's difficult to get the letters exactly the same thickness. You can't put the same mls in each because the letters themselves are different sizes. I've marked the height of the resin with a sharpie on a toothpick to create a measuring stick of sorts. It worked pretty well but not perfectly.

6. Pop any surface bubbles immediately using one of the following methods:
- Toothpick: puncture or raise out of the surface.
- Fire: heat top of resin with match, lighter, or torch to incinerate bubbles.
- Straw: blow the surface very gently through a straw
7. Wait 10 minutes or so and repeat step.
8. Repeat every 10 minutes up to an hour as needed.
9. Let molds cure for 24 hours. If resin is sticky, let sit for another 24 hours. If it is still sticky, your measurements were likely off, and you will need to start again.
10. Pop letters out of molds, and use a low-abrasion (fine or extra fine) nail file to smooth any rough edges on the back. Be careful not to scratch the flat, clear surface.
Extra Tips:
- If you use a matte mold, your letters will turn out matte and not clear. I learned the hard way and made 3 sets of numbers using 2 different molds before I figured it out! If you want them to be shiny and clear, be sure to use a shiny mold.
- Use nail polish remover to get any stray resin off your skin.
- Use your letters for decor in your little's bedroom or as a great teacher gift!

- You can also use your letter molds to make adorable crayon letters (spell the child's name for a great gift)!
